
1. Introduction
Your kitchen is the heart of your home—a place where memories are made, meals are shared, and creativity comes to life. But over time, even the most cherished kitchens can feel outdated or inefficient. That’s where kitchen remodeling comes in—a chance to breathe new life into your space and align it with your current needs and tastes. However, embarking on a kitchen remodel is a significant commitment that requires proper planning, clear goals, and an understanding of the timeline involved. In this guide, we’ll take you through each phase of the kitchen remodeling process, from initial planning to the finishing touches, ensuring you’re prepared for every step along the way.
2. Planning Phase
Define Your Goals
Before you tear down walls and remove the cabinetry, consider your goals for the remodel. Do you want something a bit more minimalist? Is your need for more space as well as improved performance? Your goals need to be well stated so that you can use them to make the right decisions when undertaking a remodeling project. It would be useful to distinguish between what is essential and desirable: many people like to list wants compared to needs.
Establish a Budget
Budgeting is easily one of the most important considerations during the planning phase of any project. Depending on how much they want to change, a kitchen remodel can cost anything from a few thousand dollars to twenty-five thousand or more.
This means consideration should be paid not only to the price of raw materials and workmanship but also to possible time losses or other extra costs that may be incurred. A good budget in advance can avoid quite a lot of stress.
Choosing a Designer or DIY?
Another main consideration is whether or not to get a designer or handle the remodeling yourself. Even if you had planned to save money and do the work by yourself to avoid hiring the services of a professional designer, this will entail several disadvantages and could lead to compartmentalized and unsightly remodeling.
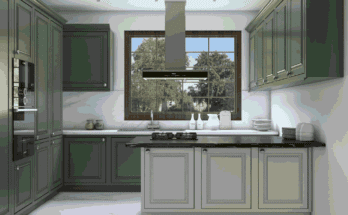
3. Design Development
Creating a Functional Layout
Kitchen design is undoubtedly among the biggest choices you are likely to make. It must be not only beautiful to the eye but also practical.
One trend is the work triangle, which means arranging the stove, the sink, and the refrigerator in a triangle-like layout to ensure the shortest distance between the kitchen’s key activity centers. Talk with a designer or look for an application that will show how such an area will work in terms of circulation.
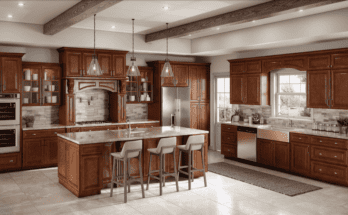
Choosing Materials
When matched with the right kind, they create a durable surface that will support the look of the kitchen for a long time. Consider not only what you will place on the counter or the shelves but also what would look great there.
Granite, quartz, and marble are some of the most popular countertop materials, while custom cabinets add a luxurious look to the kitchen. Do not be overly focused on your floors and backsplashes. They need to be easy to clean and maintain, though they should fit the whole idea of your kitchen.
4. Permitting and Ordering
Permit Requirements
If your work is based on where you live or depending on the extent of the remodeling, then permits could be required.
If you plan to change the structural aspects of your mobile home, electrical systems, or plumbing, you will probably need the local government’s permission. It is wise to get a clear understanding of the permit-acquiring process at the initial stage to prevent circular dates.
Ordering Materials
Once you have acquired the permits necessary to embark on construction, you will need to order materials. These orders should be placed well in advance, as cabinets and other specialty materials may take weeks or even months to source.
A common issue that causes delay is the late arrival of material when working on a construction project; therefore doing a good follow-up is crucial.
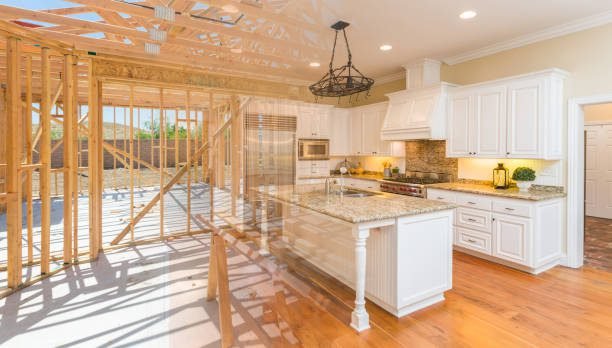
5. Demolition
Preparing Your Kitchen for Demolition
In preparation for demolition, empty your entire kitchen as much as possible. This includes eradicating every single appliance, personal article, and item, as well as easily broken objects. Seal the remainder of the house with cheap plastic sheathing since the fire will probably start in the kitchen.
Demolition Process
Now comes the fun part—demolition! This is when your old kitchen starts to disappear. Depending on the extent of your remodel, this phase can last a few days to a couple of weeks. During this time, old cabinets, countertops, and flooring will be removed to make way for the new.
6. Structural Changes

Installing New Plumbing and Electrical Systems
If your modification entails changing the position of your kitchen layout, then a new plumbing or electrical system will be needed.
This involves shifting the pipes to match new sinks or installing new outlets for new appliances. All these changes to your house should meet legal requirements for construction within your area.
Wall and Floor Modifications
In this step, you should ask your team to consider if any existing walls have to shift, and any floors that may require strengthening should be put in this stage. Both changes are essential to redesign your kitchen, knock a wall down for an open-concept design, or add an island.
7. Rough-Ins
Installing Cabinets and Countertops
However, after structural modifications have been made, stands and counters can be fitted. This step normally takes between a few days and a week, depending on the project’s design. Custom ones will cost more and take longer than usual, hence the need to factor this into your time frame.
Appliances Placement
After the cabinets are installed, this is the real deal; start arranging your appliances where you feel they are most worthy.
This ranges from your refrigerator to your oven in the kitchen, and the living room has all the appliances you might require in a house. Make sure that everything fits into place, that you have your layout memorized, and that you install all pipes and wires correctly.
8. Flooring Installation

Choosing the Right Flooring
Flooring is a critical decision that affects the look and performance of your kitchen room. Just imagine going from tile to hardwood; the choice is almost limitless. Select a material that will blend well with the rest of the interior design and should be hard-wearing and easy to clean.
Installation Process
Flooring is often the final step in home remodeling since it protects newly installed floors from construction debris. Depending on the material used, the installation might take as little as a few days.
9. Finishing Touches
Installing Lighting Fixtures and Backsplash
It’s amazing how different the lights can change the entire look of your kitchen. They include pendant lights, recessed lighting, and under-cabinet lighting, among other types of lights.
After the light is in, you can determine what type of backsplash will complete the look and bring that extra burst of color, texture, or whatever you desire.
Final Painting and Trim
As with most building projects, the last details are applied once all major construction aspects are provided, including the color of the walls, trims, and any ornamentation. This step brings the full and final look of a professional kitchen into your kitchen space.
10. Inspection and Approval
Final Inspections
As is customary, certain final inspections must be completed before you can use the kitchen fully. These inspections will check whether the systems, such as the electrical or water supply in the homes, are compliant with the law.
Approvals from Local Authorities
After all necessary inspections, you are cleared by local authorities, and you obtain a green light, meaning that your kitchen remodel is done, and you can start using your kitchen.
11. Final Cleanup
Cleaning Up Construction Debris
So, before the organizing begins, one needs to do a thorough cleaning to erase all the construction dust or debris. Ensure this is within the package provided by your contractor; otherwise, you are likely to have to bring in cleaners.
Final Touches Before Using Your New Kitchen
Before you start to pop those first pots on the stove, you owe it to yourself to appreciate and even drool at the effort. For individuals, bring enhancements into the house through decorations or appliances that will suit your taste.
12. Expert Insights
Common Mistakes and How to Avoid Them
Many homeowners underestimate the time and cost of a remodel. Another common error is neglecting to plan for temporary kitchen solutions during renovation. Having a clear plan from the start will help you avoid these pitfalls.
13. Case Study
A Real-Life Kitchen Remodeling Timeline
Consider Sarah’s kitchen remodel, which lasted 12 weeks. From the planning stage to the final inspection, Sarah faced delays with material deliveries but managed to stay on track by working closely with her designer and contractor.
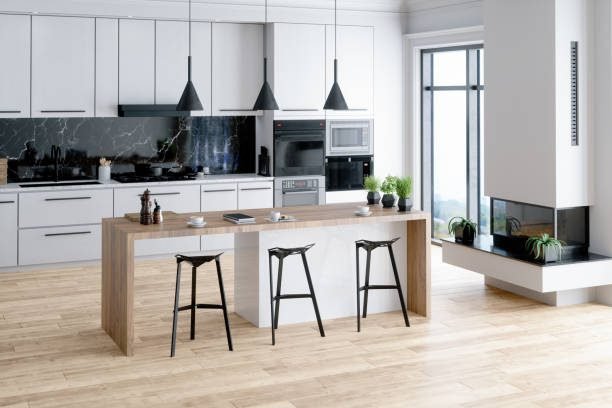
14. Future Trends
Emerging Kitchen Design Trends
As we look to the future, trends such as smart kitchens, eco-friendly materials, and open-concept designs are gaining popularity. Keeping these trends in mind can help future-proof your remodel.
15. Conclusion
A kitchen remodel is no small undertaking, but with careful planning, clear goals, and a realistic timeline, it can transform your home. Whether you’re updating for functionality or aesthetics, the key is to stay patient and flexible. The result will be a space that reflects your style and enhances your daily life.

2 Comments on “The Ultimate Kitchen Remodeling Timeline Guide”